There could be a number of reasons as to why this may be useful, my reason being is the quick launch navigation as it is, is rather packed and therefore trying to use this functionality requires a lot of scrolling down every time. Fortunately you can place some script on the page to push the Metadata navigation to the top of the quick launch, code courtesy of Steve Borgwordt.
Within your list, edit the page and insert a Script editor webpart (Found in Media and Content under the Categories section). Add the following code below.
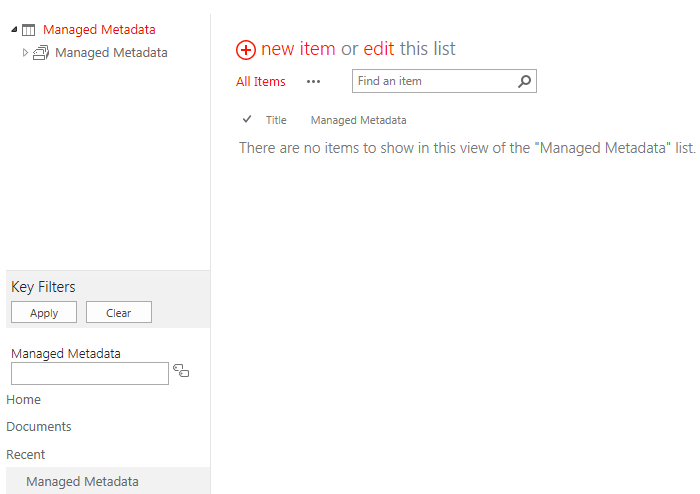
If you are unable to view the Metadata navigation settings, check the site features to confirm the ‘Metadata Navigation and Filtering’ feature is activated.
Recently I had an issue where a site owner could not access the Site Permissions, List or Library permissions. This was due to an Owner of the site collection removing the permissions for everyone accidentally and then a site collection admin adding them back in. The downside to this is that the owners group is no longer associated to the Access Requests List. The Access Request setting can be turned on or off, the option for Access Request Settings is then in the ribbon under Site Settings – Site Permissions. The resolution to this is to follow the Microsoft KB article here however, the alternate fix would be to just turn access requests off, although this wouldn’t be everyone’s ideal solution.
The Microsoft KB article is also below should the link ever change.
SOLUTION
To resolve this issue, users must be either site collection administrators or be members of the Owners group for the site. The Owners group must also have permissions to access the Access Requests list. Use the following solutions as appropriate for your specific configuration.
Site collection administrator
If an affected user should be a site collection administrator, go to the following Microsoft website for more information about how to manage administrators for your sites:
If the user should be a site owner, you must add the user to the Owners group for the site. To do this, follow these steps:
As a user who can change site permissions, browse to the affected site or site collection. Click the gear icon for the Settings menu, and then click Site settings.
Click Site permissions.
Click the Owners group for the site.
Click New.
In the Share dialog box, enter the user account of the user who you want to add to the group. Then, click Share.
Test to verify that the user can now access the list and approve or decline requests.
Make sure that the Owners group has permissions to the Access Requests list
If the Owners group is changed or was removed from the Access requests list, you must add the Owners group permissions for the list. You must also make sure that the affected user is included in the Owners list. To do this, follow these steps:
As a user who has the Manage Permissions Permission Level on the affected site and who also has access to the Access Requests list (for example, a Site Collection administrator), browse to the Access Requests list in Internet Explorer.
Press F12 to open the F12 Developer Tools window.
Click the Network tab, and then press F5 to enable network traffic capturing.
Refresh the Access Requests page in Internet Explorer. After the page has loaded, press Shift+F5 to stop capturing network traffic.
In the Developer Tools window, double-click the first result in the URL list. This URL ends in “pendingreq.aspx.”
In the Developer Tools window, click Request body.
In the search box, type pagelistid:, and then press Enter.Note The search highlights the pageListId text.
Copy the GUID that follows the pageListId. The GUID will be between an opening brace ( { ) character and a closing brace ( } ) character as follows:
{GUID}
Note Include the opening and closing brace characters when you copy the GUID. This GUID is the identifier for the SharePoint Online Access Requests list for your organization.
In the browser address bar, enter https://<URL<URL of affected site or site collection>/_layouts/15/ListEdit.aspx?List=<{GUID}>, and then press Enter.Note In this address, <URL of affected site or site collection> represents the URL for the site collection in which you want to change the access requests (for example, https://contoso.sharepoint.com). And <{GUID}> represents the GUID that you copied in step 8.
On the Settings page, click Permissions for this list.
Make sure that the Owners group for the site is included in the list of permissions for the Access Requests list. If the Owners group for the site collection does not exist, click Grant Permissions, enter the name of the Owners group for the site in the Share dialog box, and then click Share.
Follow the steps in the “Add the user to the Owners group for the site” section to make sure that the user is included in the Owners group.
Another request I’ve had is to hide columns on the new item form which in my case required the use of SharePoint Designer again. Details below.
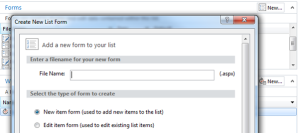
Within SharePoint Designer navigate to your list, create a new item form and edit in advanced mode (right click to edit in advanced mode).
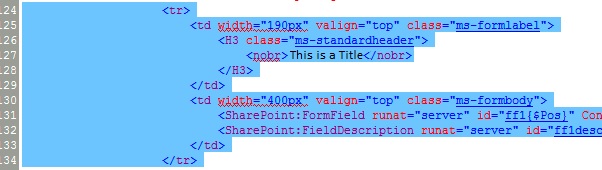
Search for your column name and highlight the code within the <tr></tr>, this can then be re-arranged in order or deleted as per the below, save the form and preview in browser.
While testing promoted links I came across an issue whereby I had too many links on a row and was displaying an arrow to view the rest of the icons which looked fairly awful. A way around this was to use a Script Editor WebPart to modify the page layout through CSS.
On the page displaying the Promoted Links, click the cog and go edit page.
Add the Script Editor WebPart which can be found under ‘Media and Content’.
On the right side of the Script Editor WebPart you will see ‘EDIT SNIPPET’, click this and insert the code below into it.
The first part of the code limits the amount of links per row, each tile has a default of 160px, so depending on the amount per row its 160*… The second part hides the arrows if there’s more items that you are currently unable to see.
A recent request I had was to prevent users from editing a column once the item had been created. This had to be done in SharePoint Designer, sure you can get around this with the quick edit option in SharePoint however, in my list quick edit was turned off to prevent this.
Open SharePoint Designer and navigate to the list, create a new edit form and edit in advanced mode.
Look for your column name and find the control mode within the SharePoint:FormField line. You will notice the ControlMode is usually set to ControlMode=”Edit”, change this to ControlMode=”Display”, save the form and check SharePoint for the results.<td width=”400px” valign=”top” class=”ms-formbody”> <SharePoint:FormField runat=”server” id=”ff6{$Pos}” ControlMode=”Display” FieldName=”DueDate” __designer:bind=”{ddwrt:DataBind(‘u’,concat(‘ff6′,$Pos),’Value’,’ValueChanged’,’ID’,ddwrt:EscapeDelims(string(@ID)),’@DueDate’)}”/>
<SharePoint:FieldDescription runat=”server” id=”ff6description{$Pos}” FieldName=”DueDate” ControlMode=”Edit”/>
</td>
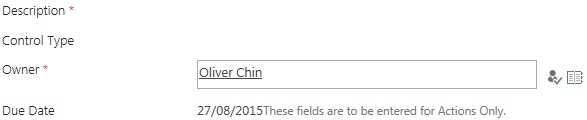
The end result is shown below, this is the edit form in SharePoint.
In the Site Contents page, there can be many lists, libraries or other apps. While searching for a specific item this can be difficult if there are over 50 apps on the screen, some lists may just be used for back end results such as look-ups. So hiding lists and libraries that aren’t being used is simple, alternatively you could just Ctrl F the page and search your for your list. This change requires SharePoint Designer.
Open SharePoint Designer and navigate to your list or library. On the information page, under settings is a tick box for “Hide from browser”, once ticked this will no longer show in SharePoint.
Unfortunately, if you are wanting to unhide this, it will no longer display in the lists and libraries in SharePoint Designer (SPD). You will be required to go to the ‘All Files’ object and choose lists, this will then show the list that’s hidden. Find your list, right click and go properties, then remove the check box to hide the list.
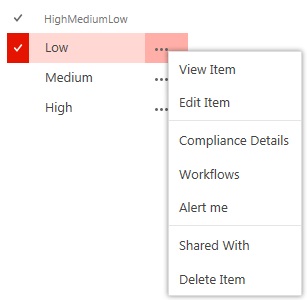
Within SharePoint the ellipses is used on the title column which is standard out of the box, unfortunately in my scenario the title column wasn’t being used and therefore, needed to transfer the ellipses to another column. This requires SharePoint Designer to change the column to what you want.
Within SharePoint Designer, navigate to the list or library of your choice, in my case I’ve chosen a list. Within the list, choose a view to modify (usually the default view), right click the view and choose “Edit File in Advanced Mode”.
Search for “<View Name=“, this is usually the longest line towards the bottom of the code. Find the part which states <FieldRef Name=”Your-Column-Name” /> and add ListItemMenu=”TRUE”. The end result should look like the below.
When you check the result in SharePoint, the ellipses will now be showing on your new column.