Over the past few months I’ve been asked whether it’s possible to hide columns based on the value of another column and whether it’s a fast and easy change, the answer is basically yes.
If you have a custom Display or Edit Form, you can manipulate the columns slightly to hide an irrelevant column. Take a look at the screenshots below of my SharePoint list and SharePoint Designer Form.
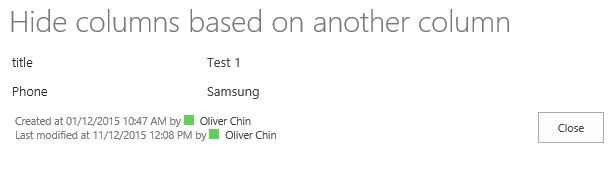
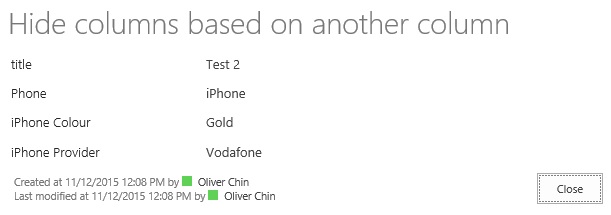
To begin with I have a list with just 4 columns. As you will notice two of the columns only relate to iPhone and therefore are useless if the phone is a Samsung.
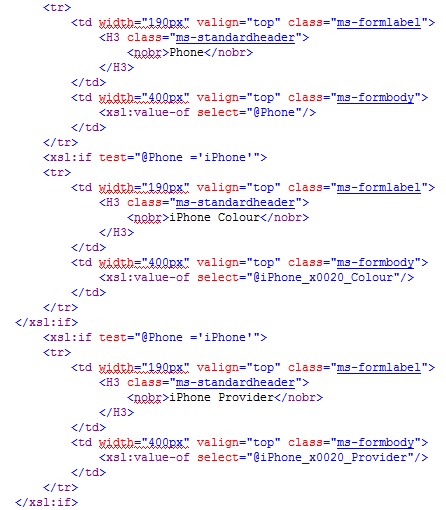
The way to hide the columns is through SharePoint Designer, edit the form in advanced mode and scroll down to your columns. The only modification that is required is to add <xsl:if test=”<COLUMN-NAME> = ‘COLUMN-RESULT'”> before the <tr> as well as after the </tr> as shown below. (code isn’t lined up, sorry about that!)
The end results when I click on each item from my list are below.
Unfortunately this isn’t possible on the New Form as this would require it to be dynamic to which mine isn’t.
An alternative way of doing this is to use to code here: https://github.com/kitmenke/sputility, copy the jquery & sputility to a SharePoint Library and reference as below. This is ideal as the form is dynamic and to me, easier to work with. Credit goes to kitmenke!
***edit the form from within SharePoint (edit page) & insert a script editor webpart to paste the below in***
In recent months I’ve created many approval workflows for many different scenarios. In this post I will provide a step by step guide of how to create a basic approval workflow.
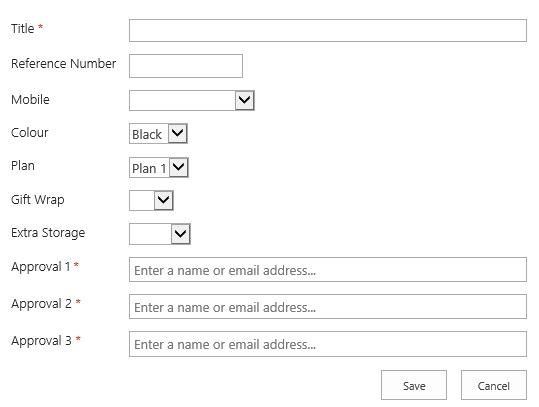
To start with I have a simple list, which has 3 approvers. Stage 1
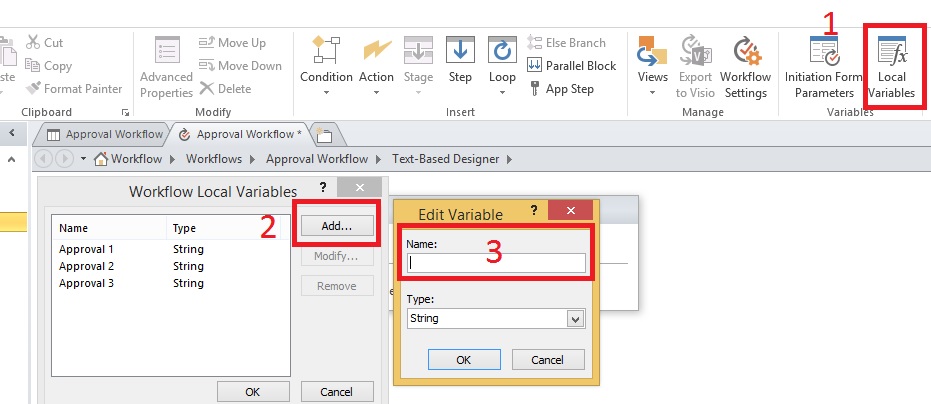
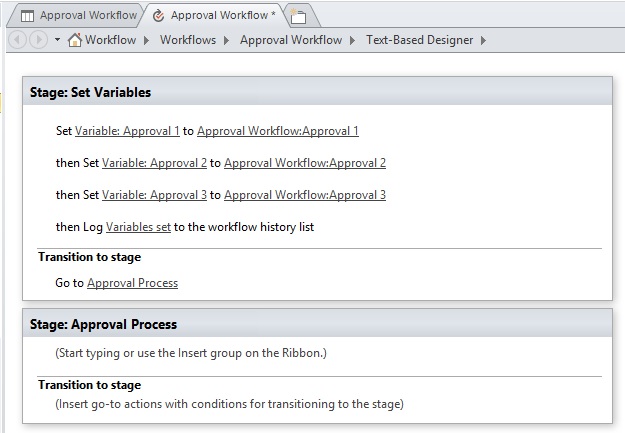
To start this workflow, open SharePoint designer, navigate to your list and create a new 2013 workflow. As per the screenshot below, in the ribbon select ‘local variables’, click add & input the name of the approver, I’ve done this three times due to three approvers (one for each approver).
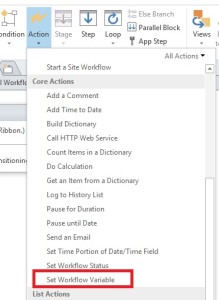
Within the first stage of your workflow, click Actions in the ribbon and select ‘Set Workflow Variable’.
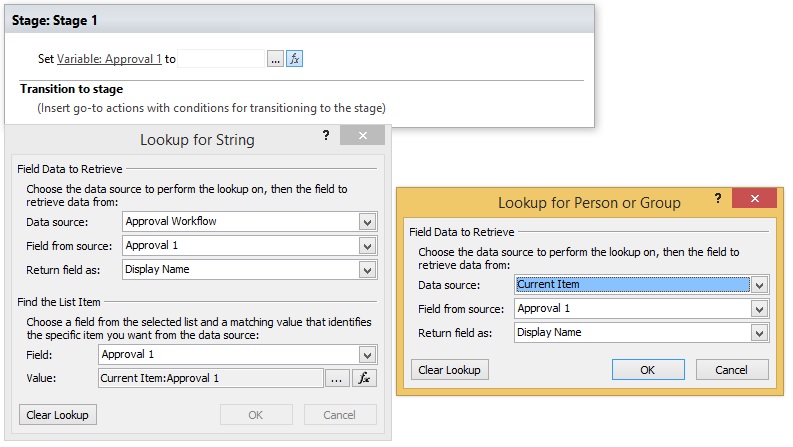
Fill out the details as follows:
In the top section:
Data Source:
Select your list
Field from source:
Select the column in your list
Return field as:
Display Name
In the bottom section:
Field:
Select the column in your list (same as Field from source)
Value:
Press the fx and set the data source, field from source & return field as the above
Your variable should look something similar to the below.
When you click OK to close the ‘Lookup for String’ window, you will be greeted by the message below, just press Yes to this.
The last part for the first stage is to set the name of the stage, log to history list & then Transition to stage. To log what we’ve done to the history list, click ‘Action’ and select ‘Log to History List’. The reason this is done is for finding where in the workflow it gets to if any errors appear when ran. In order to transition to another stage, you will need to create another stage. This can be achieved by clicking the stage button in the ribbon (next to action).
If the above has been followed correctly, your workflow will look similar to the below.
Stage 2
I tend to keep the approval stage separate from everything else, which is the reason behind stages.
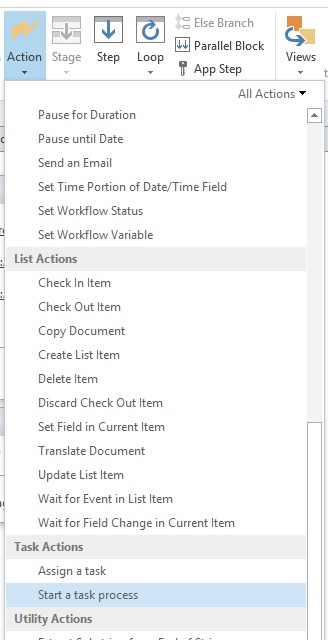
The first part of this stage is to create the task process.
Select ‘Action’ in the ribbon, then ‘Start a task process’.
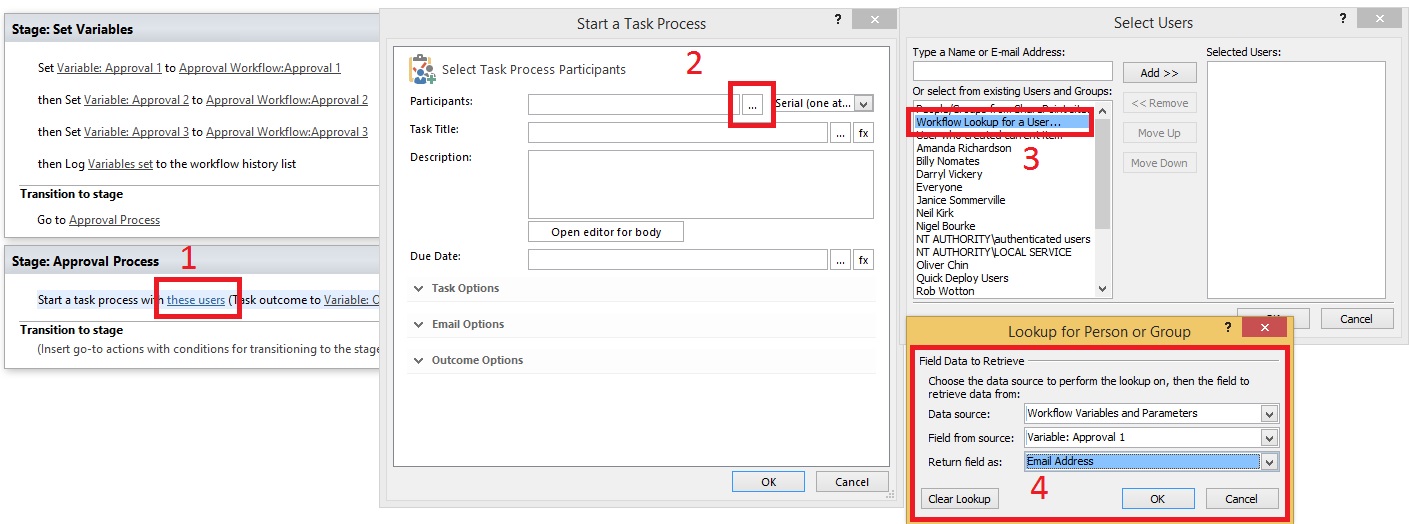
Click the ‘these users’ hyperlink for the window to open.
Click the ellipses for Participants.
Double click ‘Workflow Lookup for a User’
Data Source:
Workflow Variables and Parameters
Field from source:
Variable: Approval 1
Return field as:
Email Address
Repeat steps 4 & 5 for the Approval 2 & Approval 3 Variable.
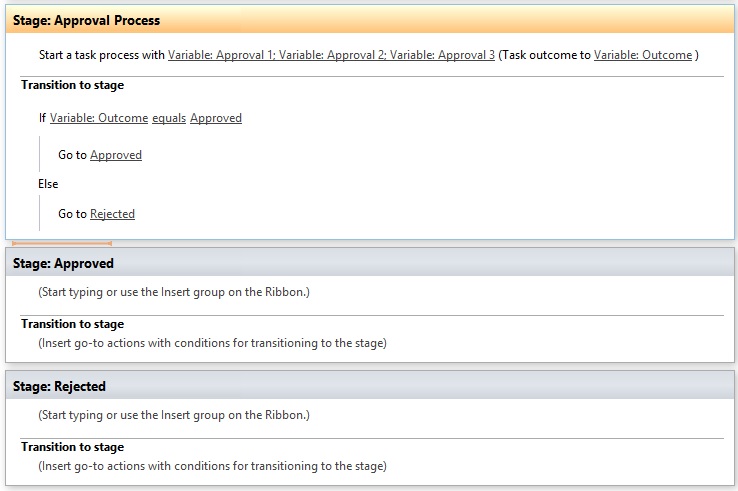
Once complete, click OK and close the task process windows. Now create two more stages, name these ‘Approved’ & ‘Rejected’. Within the approval process stage, right click the Transition to stage area and choose ‘If any value equals value’. Click the fx for the first value and put
Data Source:
Workflow Variables and Parameters
Field from source:
Variable: Outcome
Return field as:
***Blank***
Now click the second value and choose approved. Within the IF statement, right click and choose go to stage, choose Approved, below the Else, do the same and choose rejected.
The end result will look like the below.
Stage 3 & 4
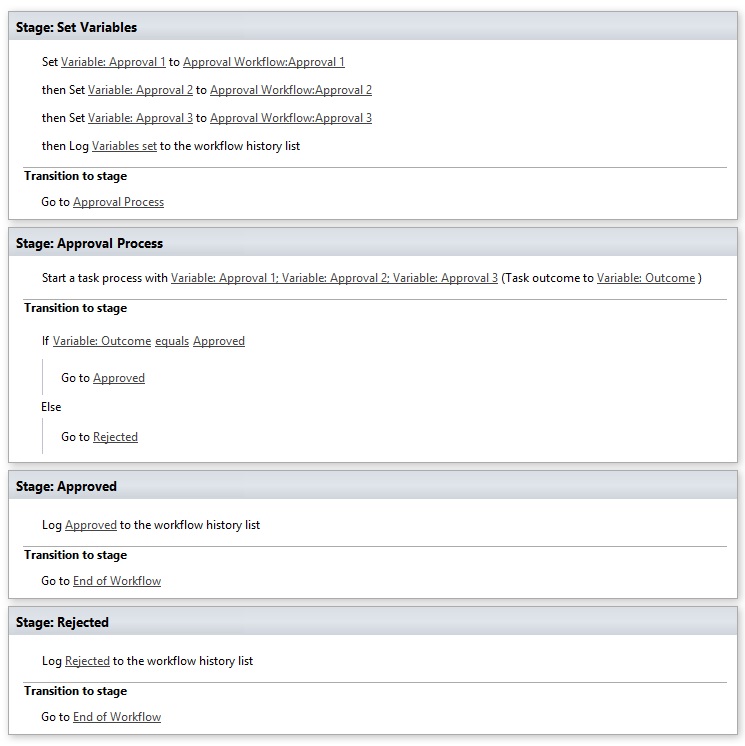
Stage 3 & 4 are similar to each other. The only real difference would be one is rejected and one is approved. Usually, once an item is approved or rejected, an email is sent out to the user who created the item to let them know it’s been approved however I shan’t go into detail on that. To finish the workflow, add an action of ‘Log to History List’ in both Approved & Rejected stages. On the Transition to stage, right click and choose go to stage, click the drop down and choose End of Workflow, this is for both the stages.
The end result is below. If you’d like to keep the user updated as to where in the approval this is, it may be ideal to use the ‘Set Workflow Status’ within the Actions in the ribbon. Alternatively, the workflow uses the Stage name for a status.

 (code isn’t lined up, sorry about that!)